
Making your own sourdough starter is very easy and only takes a few minutes each day for one week. Then you can begin your sourdough baking journey by utilizing discard recipes, and soon, once your starter has matured, you’ll be baking loaves of yummy sourdough bread!
We will be making a 100% hydration starter. This is the most common kind of starter and is used in most sourdough recipes.
First, Gather Your Supplies
Sourdough baking does not require any special supplies or ingredients besides what you most likely already have in your kitchen. (Many people will tell you that you need a special crock or jar for your starter, special baskets for your rising bread, a dutch oven or clay baker, and special scoring tools. While these things may be “nice”, they are not necessary!
Here are the basic supplies to gather as you get started:
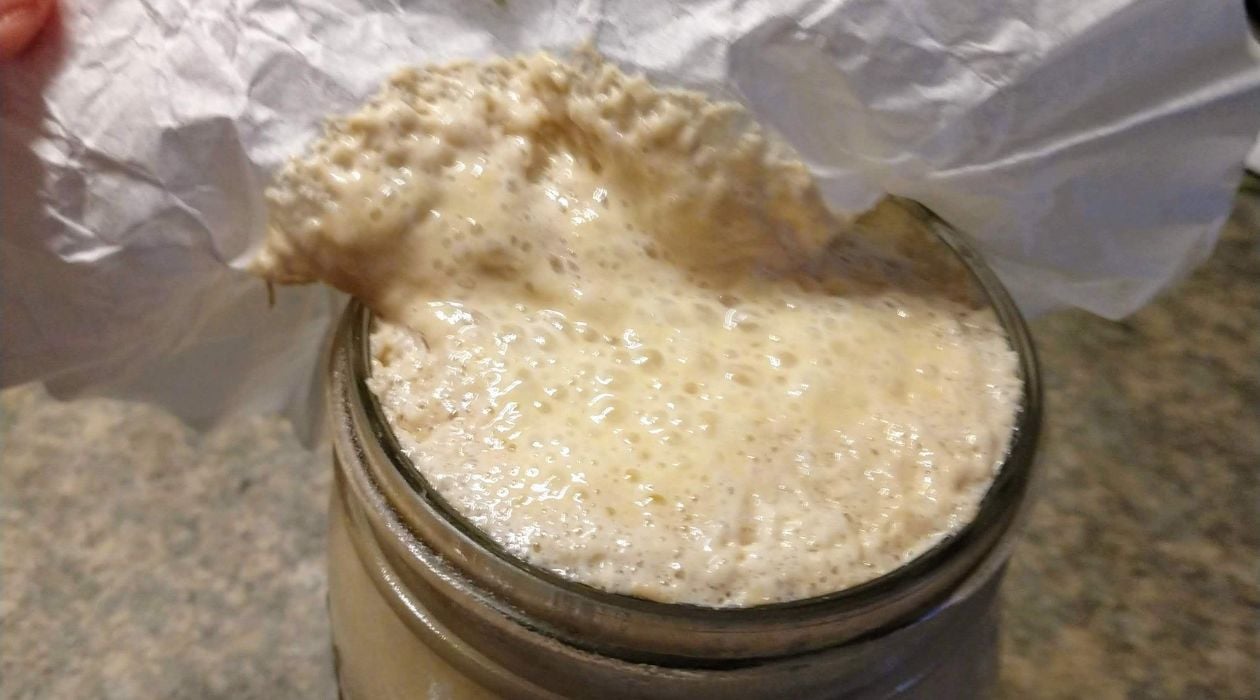
- a glass jar (wide mouth quart-sized works well) or other non-reactive container.
- Flour (organic is best but not necessary). For the healthiest baked goods, choose a whole grain flour (wheat, rye, spelt, einkorn), but you can also use unbleached all purpose flour.
- Chlorine-free water (If you have city water it is probably chlorinated. You can buy distilled water or leave your city water in an open container for 24 hours so the chlorine can evaporate.)
- Something non-reactive to stir with. (Stainless steel, wood, or I prefer a silicon spatula.)
- A clean cloth or coffee filter and a rubber band.
Once you are ready to start baking, all you need are regular measuring cups and spoons, mixing bowls, baking dishes/pans, and sharp knife. You can even bake sourdough bread in a regular loaf pan, no special tools needed.
Day 1:
Mix ½ cup flour with ½ cup water in your jar. Cover with the cloth or coffee filter and set aside until tomorrow.
Days 2 – 5:
Uncover the starter and stir. Look for bubbles and the smell of yeast. Add ¼ cup flour and ¼ cup water to the starter. Stir until well combined. Cover with a cloth or coffee filter and set aside until tomorrow.
Days 6 & 7:
Uncover starter and stir. There should be many bubbles and it should smell pleasantly of yeast. Mix ¼ cup flour and ¼ cup water into the starter. Do this twice each day (morning and evening).
If you are interested in seeing this process in video form, you can take my free video class: Make Your Own Sourdough Starter.
Start Baking!
You are now ready to bake with your sourdough starter! Begin baking using recipes that require “discard” (rather than active starter). To keep your starter healthy, feed it equal amounts of flour and water one to two times each day.
It really doesn’t matter how much flour and water you feed your starter each day as long as you feed it. The amount you choose to feed each day will depend on how much starter you currently have, how much starter you need for an upcoming recipe, and how often you choose to bake.
Because this method of making a sourdough starter doesn’t have you “discarding” anything during the process, you will end up with quite a bit of starter. You want to use this starter in “discard” recipes in order to have room to continue feeding your starter in its quart jar. Using this discard in recipes and continuing to feed your starter will help your starter to mature and become very active so your first loaf of bread can be a success!
I recommend waiting to try your first active starter recipe until you’ve been feeding your starter for about a month. This gives your starter time to mature and for the healthy yeasts and bacterias to become strong and healthy in your starter.
So, enjoy the following “discard” recipes and experience success with sourdough baking!